
This is a quick tutorial on how to make an 18" Shoo Fly Quilt Block.
I used a fat quarter for the patterned fabric and had a few strips leftover, so this is really a great block to use if you have a stack of fat quarters with a large scale pattern that you'd like to feature in a quilt. I chose Anna Maria Horner's Dowry Collection and paired it with Kona Charcoal.
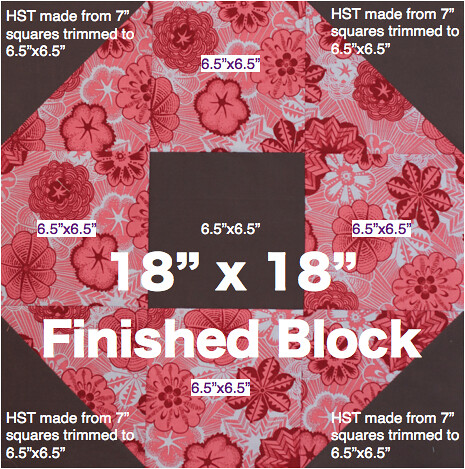
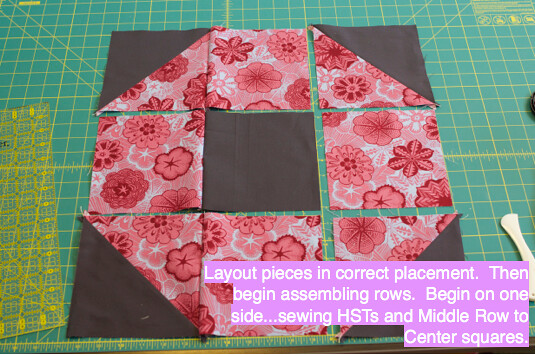
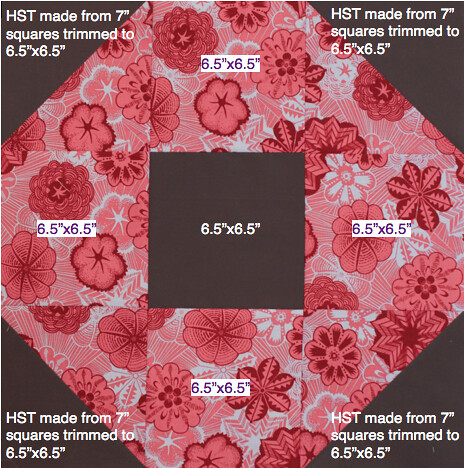
For those of you who are visual learners the image immediately below is an overview of the pieces that make up this block...
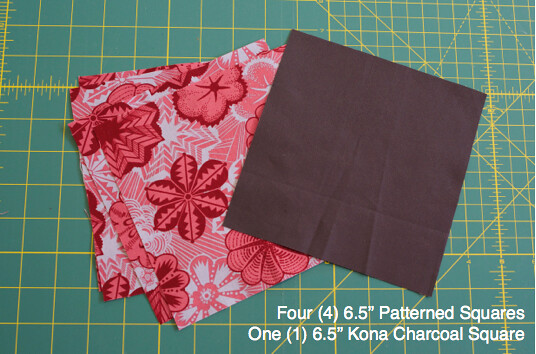
Materials:
Four (4) 6.5" Patterned Squares
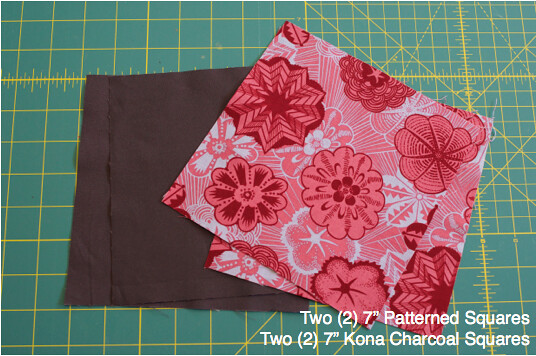
Two (2) 7" Patterned Squares
Two (2) 7" Solid Squares
One (1) 6.5" Square
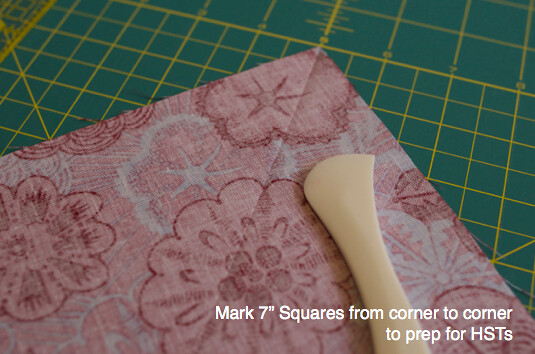
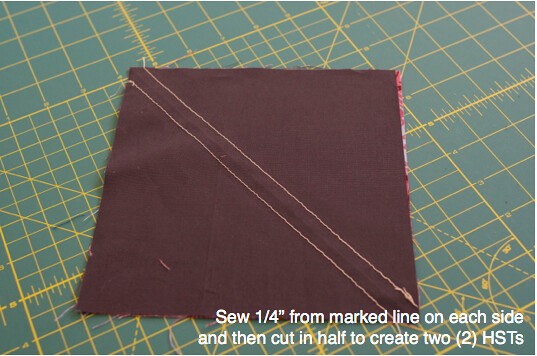
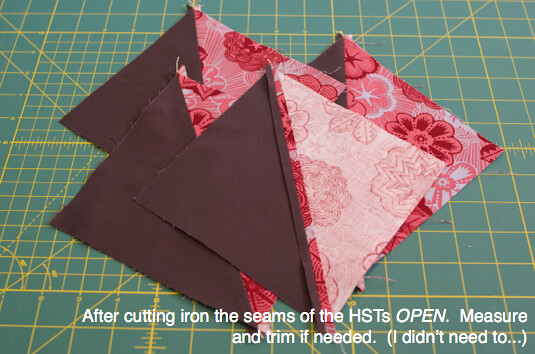
Preparing the HSTs
I figured out how to calculate the size of my HST squares by adding a 1/2" to my unfinished square size as described here. There are a million tutorials online about how to make HSTs...so this is just a quick overview. If you'd like an in depth explanation you can visit here and see the three suggested methods. I almost always utilize "Method 2".
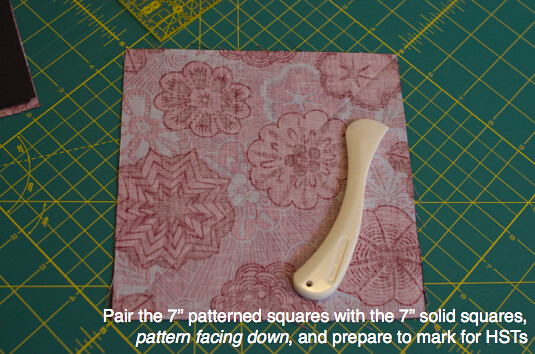
I prefer to use a Clover Hera Marker when marking straight lines, but you can use pen, pencil, fabric marker, or anything you'd like to mark your fabric with a guiding diagonal line from corner to corner.
Layout
I think I say this in every quilt block tutorial, before I sew I always lay out my squares. For me it helps me check my cutting job and map on how I am going to piece it all together. In this block I think it is key to map it in a certain way in order to tackle the ironing. All seams are 1/4"!
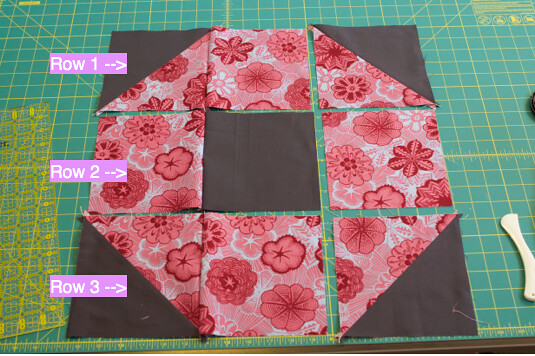
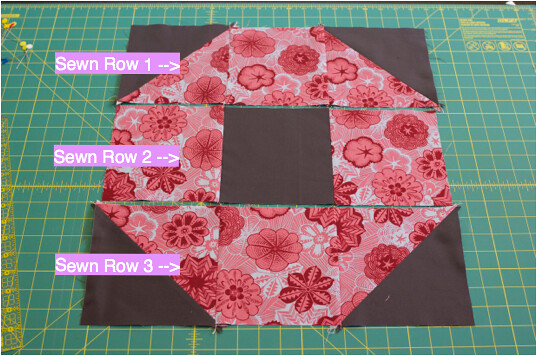
Please note which are Rows 1, 2, and 3 as this will come into play when we discuss ironing... When sewing look at the overall square and make your rows working from Left to Right. This will create horizontal rows as seen below.
IRONING
I am normally not someone who cares about ironing seams to one side or open, when it comes to which is better I shrug and simply stay out of the fray. However(!) in a block this large I found that lining up your seams is extremely important because with the size of the block and so few seam alignments it is really obvious when the seams do NOT line up. So, a bit of anal ironing can really help you line up your seams later...
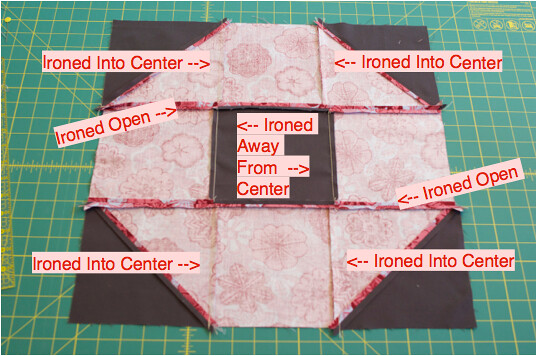
Rows 1 and Rows 3 (or Top and Bottom Rows with the patterned fabric in the center and HSTs on each end) should have the seams ironed INTO THE CENTER. Row 2 (or the Middle Row with the solid square in the center and 6.5" patterned squares on the end) should have the seams ironed AWAY FROM THE CENTER.
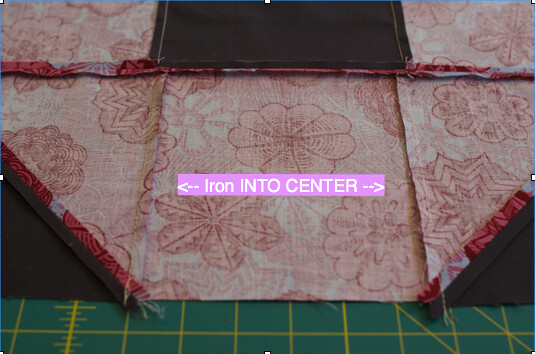
Rows 1 and Row 3 Iron IN
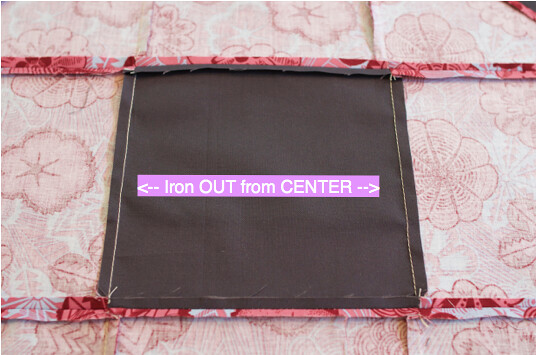
Row 2 Iron OUT
Joining the Rows
Once you have your rows all sewn together, again, I would suggest laying them out and seeing whether your seams should meet once sewn. If things look really wonky at this stage then you might want to remeasure your squares and make sure everything is the right size before going down a frustrating path.
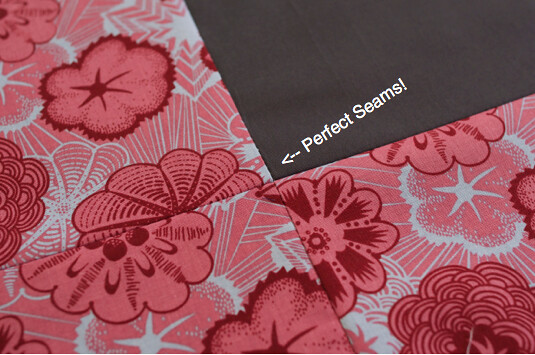
Then carefully line up your seams, using your ironing to guide your alignment.
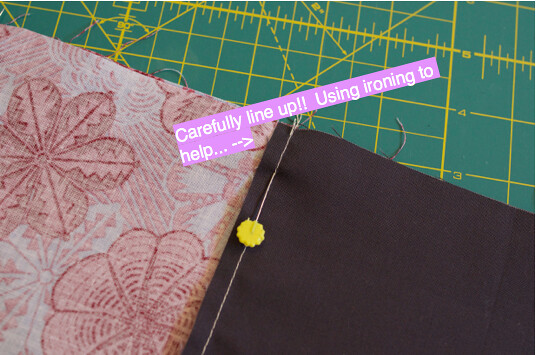
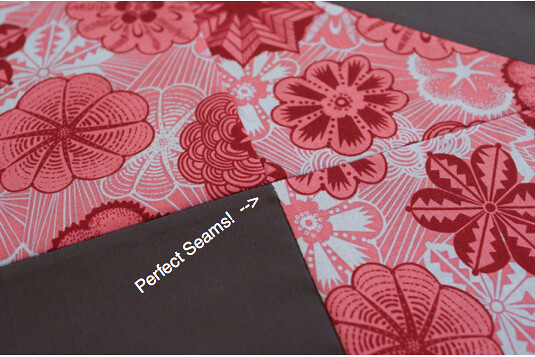
Don't forget, with so few joining seams having an "off" alignment will be really obvious! So use your pins and your ironing to line that baby up to get perfect seams.
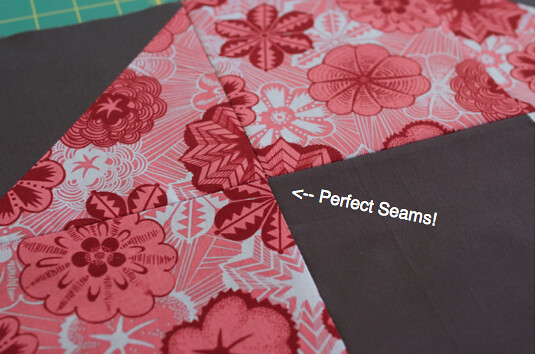
Sew together and...
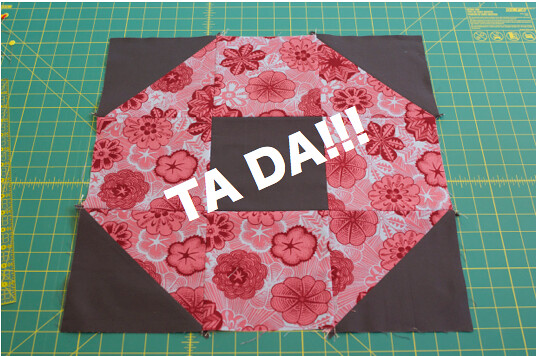
One more overview for those visual peeps...
As always, let me know how this tutorial works for you. Feel free to post suggestions or comments below!
- rebecca lynne