Thursday, August 29, 2013

Zig Zag Folksy Flannel Quilt Top

Untitled
I started working on these Anna Maria Horner Folksy Flannel zig zag flannel quilts last summer!  Agh!
Untitled
I can't believe how quickly this top came together on my Juki.  Kind of makes me feel silly for not working on this earlier.  I am just going to add a flannel backing and maybe do a foldover binding...really simple which will be perfect for the girls!
Untitled
UntitledUntitled
I've been feeling very poorly all week so I haven't done much else.  But, it makes me happy to see this top put together and looking so comfy even through photos!

- rebecca lynne

Sunday, August 25, 2013

Sewing Machine Adultery: Bernina Aurora 440 QE Review

Sewing Machine Adultery
If you have been following the Sewing Machine Adultery series at all then you know that the series is all about sharing insight, advice, and to create a resource for those of us with a wandering eye...when it comes to sewing machines of course!  When I emailed Jess of The Elven Garden to tell me more about her love for her Bernina Aurora 440QE she was so enthusiastic that I had to ask her to do a review for all of us - luckily she happily agreed!  This is a machine model I have been lusting over for awhile now.

As with all the Sewing Machine Adultery Reviews I encourage you to ask questions, leave comments, and review the comments if you have stopped in here to learn more about this sewing machine.  Some of the best insight comes in the comments following the review!  [Also, if you leave a comment, please provide your email...there is nothing more frustrating than a No-Reply Blogger!]

Now, enough from me and onto the review!

Bernina Aurora 440QE Review

Thanks so much Rebecca for inviting me to talk about my Bernina - I have quite a lot to say about her :o) 

I have had my Bernina for just over two years, and have loved every minute of her. I upgraded (from an entry level Elna machine I’d had for about 6 months, which I bought from my local Spotlight aka Joannes) when I realised I was pretty much addicted to making quilts. That hasn't changed - and I don't think it will - so it was definitely a worthwhile investment!

They have a pretty hefty price tag – the RRP in Australia is $2,999, although mine was on sale for $2300 when I bought it. The RRP in the US is around $1700 (plus sales tax depending on where you live, from what I can gather). I honestly think it is worth it though – it is a beautiful machine with a powerful motor. Bernina have an awesome reputation for a reason – the stitch quality is superb and these machines are built to last. I don’t anticipate having to replace it for a very, very long time.

The Bernina 440QE has a lot of features – some of which I haven’t touched yet (mostly the decorative stitch functions) - but most of which are things I was looking for in a machine when I bought it.

Machine Features:

BSR:

The BSR Foot

The main reason I bought this machine over the other similar machines available at the time was the special free motion quilting foot it comes with. The BSR foot (Bernina Stitch Regulator foot) is a computerised foot specifically designed for free motion quilting. It senses the movement of fabric below it and automatically moves the needle up and down accordingly. What this means is that the foot itself will regulate stitch length depending on how fast the fabric is being moved. I love this feature – and it has given me the confidence to really push my free motion quilting skills beyond simple stippling. Quilting is my favourite part of the quilt making process, and I seriously thing most of that love comes from using BSR.

One of the really cool things about the BSR foot is that you can manipulate stitch length and speed when using it. This is really helpful if you’re wanting to do really intricate free motion quilting (for example the pebbles on my Aspen Grove block – these are about ¼” pebbles, so I used a really short stitch length).

BSR doesn’t work perfectly all the time – occasionally I will get really long stitches if I move the quilt jerkily (for example if the quilt gets a bit caught on my machine and moves really suddenly). This is pretty rare though – most of the time I will quilt an entire quilt without any issues. I have never had problems with getting balls of thread on the underside of the quilt either – and in the two years I've been quilting with BSR I have never had a problem with tension.

The photo above shows the clear round attachment at the bottom that I normally use when quilting - but the BSR foot also comes with two other attachments, and open toe and closed toe metal foot.


The BSR foot comes with it's very own padded tin. It's special like that ;o)

Other Accessories:


The standard accessories that come with the Bernina 440QE include:

  Accessory box – like a little sewing machine wardrobe. It’s daggy but I love this so much. The accessory box is designed so that it can be attached to the back of the machine (for example if you were taking the machine to a class), or it has two feet at the back that you can flip out so it operates as a free-standing accessory box. It has a bobbin compartment, several drawers and hanging space for all the feet that come standard with the machine (plus room for another five feet if you choose to buy others). 
·         


  •  Reinforced soft cover/ carry case -  This has room for the machine and all the accessories that come with it.
  •      Extension table – 8.5” x 15.5”
  •      Free hand system (knee lift bar)


In terms of features, it ticked all my boxes.
  •      Automatic needle threader (which I have never actually ended up using)
  •      Three thread cutters (one on the side near the presser foot, one in the bobbin case, and one near the bobbin winder).
  •      Ability to drop the feed dogs 
  •      Start/stop button when using the BSR foot.

Dimensions:

Height – 12”
Width (without extension table) – 15”
Depth – 7”
Throat space 7.5”

Number of Feet included:

8 feet – including
·         ¼” patchwork foot
·         Zipper foot
·         Automatic button hole foot,
·         Blindstitch foot
·         Open embroidery foot
·         Walking foot
·         BSR foot

Bobbin Type:

The Bernina 440QE has a front loading bobbin – which for me is absolutely brilliant while quilting. It means I can change an empty bobbin without having to remove the quilt to access the bobbin case. It also has a separate spool holder on the machine, so that you can wind bobbins without having to unthread the machine – again a great feature if you run out of wound bobbins half-way through quilting. It comes with five metal bobbins - although I've found extra bobbins are only about 65 cents each from an Australian supplier.

Computer Features:

This is pretty much a fully computerised machine. There are a couple of manual functions – including a hand-wheel for raising/lowering the needle manually, and a dial for raising and lowering the presser foot pressure. The thread tension can also be manually adjusted (although I have never touched this dial – I’ve never had to.)


Aside from that, this machine has a tonne of buttons on the front of the machine to adjust:
  •          Needle position (this can be moved in five increments either side of the central point)
  •          Needle up/down – this can be set to end either down or up as you’re sewing. I tend to start and end all my stitching with it set in the needle down position – and rarely get thread tangles at the beginning of my seams. It also works beautifully when chain piecing.
  •          Reverse button.
  •          Pattern begin and pattern end buttons (when using decorative stitches you have programmed into the memory)
  •          Securing function button
  •          BSR/balance button - there are a couple of different 'modes' when using BSR.
  •          Stitch width buttons (this can be adjusted up to 5.5 wide stitches for zig zag stitching etc)
  •          Stitch length buttons (up to 5mm long)
It has a huge stitch memory as well – any combination of 90 different stitch types can be saved into the memory, which is a long term memory. They remain saved until they are deleted. 

Type of Needles:

The recommended needles are Bernina needles, although I have used quite a few brands of needles in it without any problem. I’m currently using Schmetz Stepp-Nadel quilting needles simply because they are easily available locally.

Basic Setup

This is an incredibly easy machine to use. I needed to read the manual the first time I threaded it, but not since then. The machine itself has numbered diagrams on it for the various steps needed to thread it. For me, it is a really intuitive machine – it is so easy to adjust the things I often change, like stitch length. The computer screen is big enough to easily read and identify what settings are currently being used.


Types of Stitches:

It has 180 different stitches. This is one aspect of my machine I have barely touched – although I have tried out several of the quilting stitches. Most of these are decorative stitches, and it has three different alphabets.

Manufacturers Sites:

Bernina Australia: http://www.bernina.com/en-AU


Cons:

There are a couple of things I think are a bit limiting with this machine.

  • Considering it is a purpose built quilting machine, the throat space is pretty small. I have successfully quilted some pretty big quilts (in the realm of 96” x 72”) – but a larger throat space would definitely make this easier. I think the newer 800 series Bernina models have a bigger throat space – but they also have a much bigger price tag ;o)
  • There are a tonne of embroidery stitches and alphabet functions I have never used, and will probably never use.

Pros:

  • It is pretty quiet to run, considering the power of the motor. My sewing room is right next to my daughter's bedroom, and I don't wake her when I'm sewing at night. 
  • It doesn’t vibrate much at all, even when sewing at full speed (this baby can do up to 1000 stitches per minute).
  • For me the biggest pro is the BSR – but if that’s something you’re not interested in the Bernina 430 model is pretty much identical but doesn’t come with BSR.
--------***--------

Thanks so much to Jess for this extremely thorough and well thought out review!  Can't you just feel her love for her sewing machine?  This model is seriously droolworthy and I'm happy to learn more about the BSR I've heard so much about from someone who has used it extensively.
Don't forget to ask questions, make comments below - I will forward them to Jess for answers.  Also, if you haven't already checked out her blog then you are missing out --- go on, go over there, you'll be completely inspired!  Her work is seriously awesome.

What about you?  Do you have a love for a machine to share?  Email me and let me know...I am always interested in more reviews to share...don't be shy!


- rebecca lynne


Thursday, August 22, 2013

Joy, for the Queen Finished!

Untitled
There she is!  Joy, for the Queen in all her finished glory...  You can check out her development here.
UntitledLow Volume BorderUntitled
Voile Cereopsis BackingUntitledRight at home #amh #patchwork
There she reigns, on her throne right where she belongs...

Joy, for the Queen
Fabric: Anna Maria Horner Field Study Charms & Low Volume Strip Border
Size: 52"x52"
Thread: Connecting Thread Natural 50w
Quilting: FMQ loopies using Juki TL-2010Q
Binding: Machine & Hand

I L-O-V-E this quilt!!!  It is a "mine all mine quilt"...a tad guilty about it but not enough to keep me from enjoying her!  Ha!

Linking up to:
Also, this is another project off my 2013 FAL Q3 list!  Whew hew!!!
she can quilt
- rebecca lynne

Wednesday, August 21, 2013

Sunday, August 18, 2013

How to Swap Zipper Pulls Tutorial

Zipper Shot

Tutorial: How to Swap Zipper Pulls

Alright - start with the BOTTOM of your zipper pull.  
(To me the bottom is the end where your pull stops when the zipper is pulled completely open.)
You will see a little metal tab keeping the two sides closed (below).  
Zipper End
Flip it over and you will see that the tab is attached to the zipper with little metal teeth (below).
Back of zipper end, notice the "metal tab teeth"
Using something sharp like a knife or scissor pry open the teeth and carefully take out the metal tab.
Please try not to cut yourself.
Bottom of zip without metal tab
Now your zipper bottom should look like the above photo with no metal tab and the ends of the zipper sides are still plentiful allowing you to 1) take off the original zipper pull and then 2) easily thread on the new zipper pull.
Attach zip pull to end without metal tab
This is actually a purple zipper with a new pink pull being threaded on...next time I swap pulls I'll replace the photos with more obvious color changes!

IMPORTANT TIP: Your Zippers Styles must be the same for this to work.  (Trust me, I learned this the hard way!)  An easy way to match up your zipper styles is to check the back of the tabs.  In the photo below you can see that the yellow and purple tabs are the same style, the pink is different!
Zipper styles must be the same!  Check zipper pulls.

See?  Easy peasy...
Let me know if you have questions!

- rebecca lynne

Saturday, August 17, 2013

Lovesme Herringbone Triple Zip Pouch

Untitled

Another post where I am going to let the photos do the talking...hope you don't mind...  If you'd like to see the progress of this pouch you can go here.
I took a lot of photos because I knew I was sending her to a new home. In fact, she should arrive today!UntitledUntitled
Untitled
UntitledVoile LiningUntitledUntitledUntitledUntitled
I had a lot of fun making this and learned so much.  Paper pieced, AMH, voile, I finally used selvage in a purposeful "make a message" kind of way, nailing my zippers, the list goes on.  Sewing over all the seams and making sure the zippers stayed straight was a challenge - I think I sewed them at least 3x on each side to make them line up!  I did enjoy the paper piecing however I used large sketch paper with my design drawn on it and that made the paper a pain to remove.  I think I'll use freezer paper next time to make the seams finer and the paper easier to take off...and if I had had more time I would've quilted the whole piece for added security to all of those intricate seams.

I've written a quick tutorial on how to swap the zipper pulls so stop by tomorrow to see!
Zipper Shot
Linking up!!!


Paper Piecing Party

- rebecca lynne

Saturday, August 10, 2013

Lovesme Herringbone

Absolutely! #amh
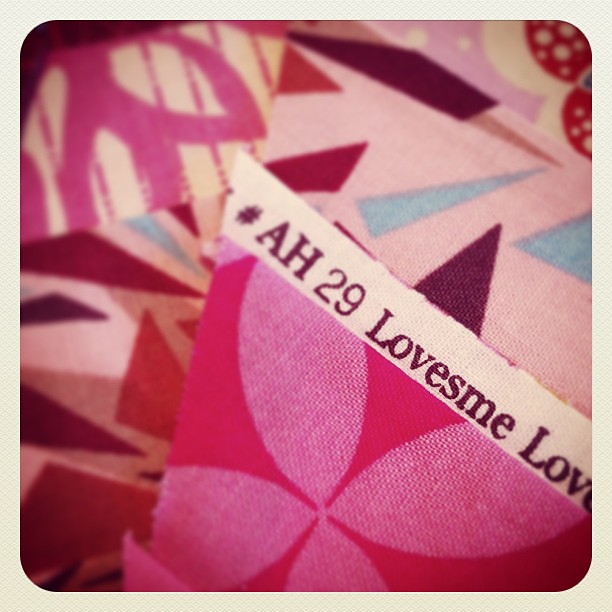
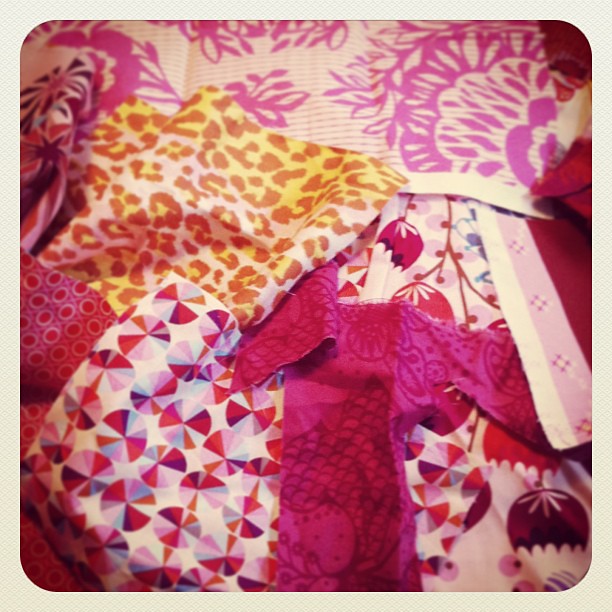
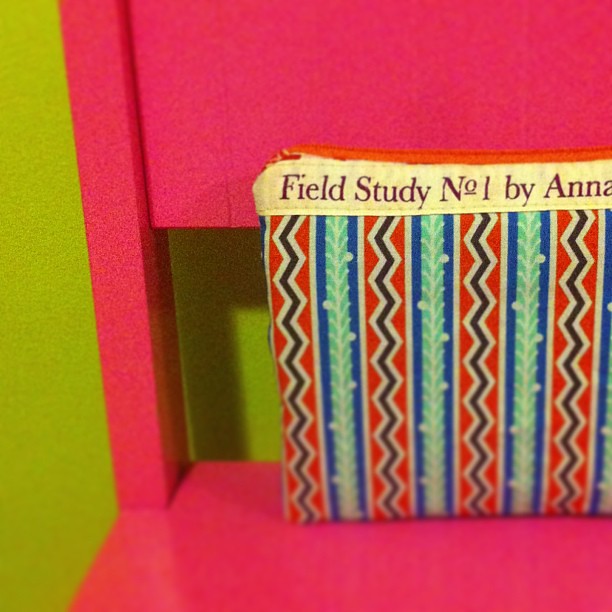
It started by pulling out my whole stash of Anna Maria Horner fabrics as inspiration for the Triple Zip Pouch Swap.  It was rather overwhelming so I divided it between warms and cools.  Surprise surprise, mother of three girls and I end up owning more pinks, reds, and purples!  Ha! 
All warm AMH
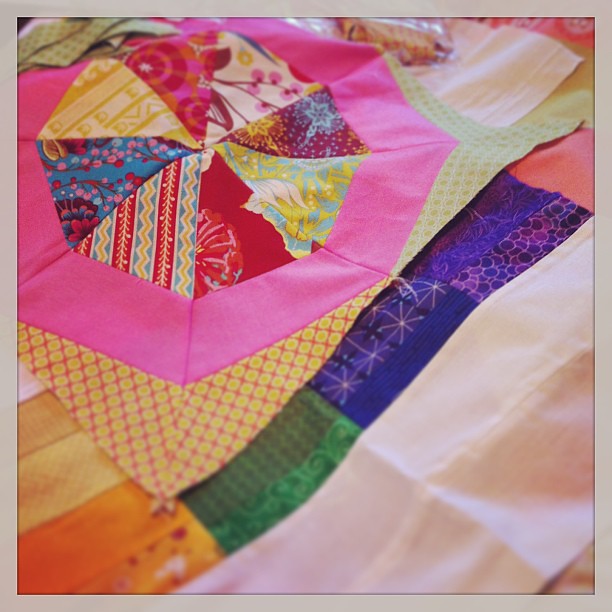
Then I had a brilliant idea, I've wanted to do a paper pieced herringbone for awhile...
Untitled
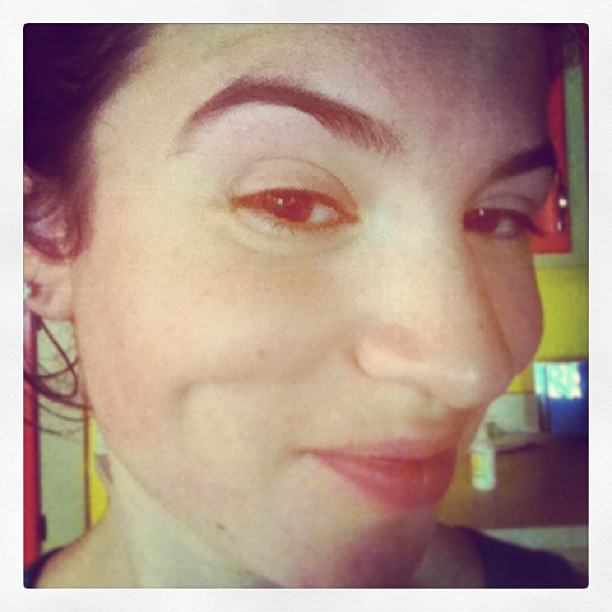
Me, looking devious...
This photo was just a coincidence from this morning, but also hilarious, so I had to throw it in!One strip down (4 to go!) #amhDSC_0097
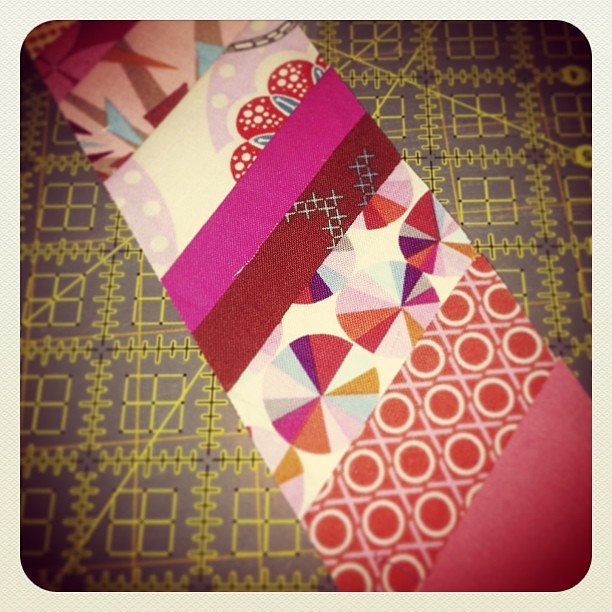
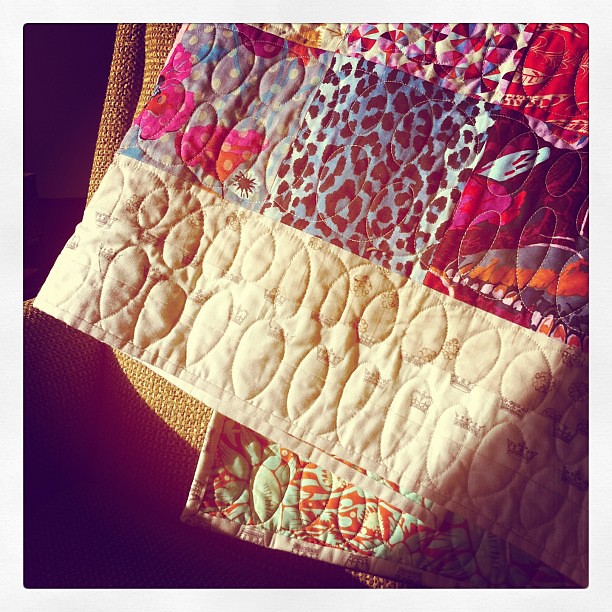
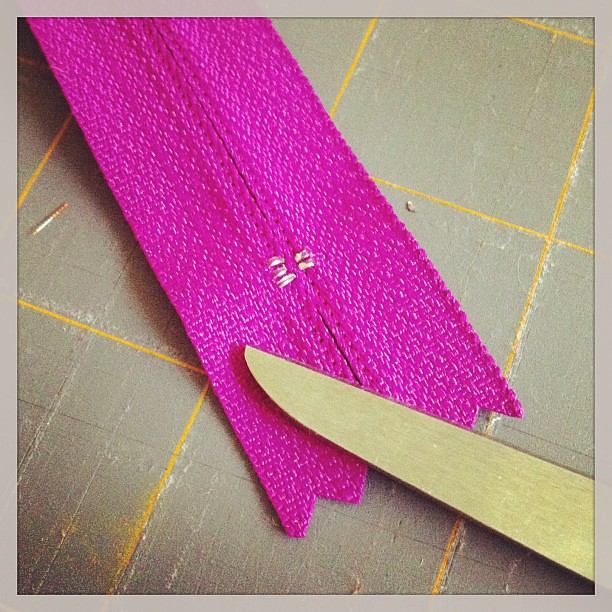
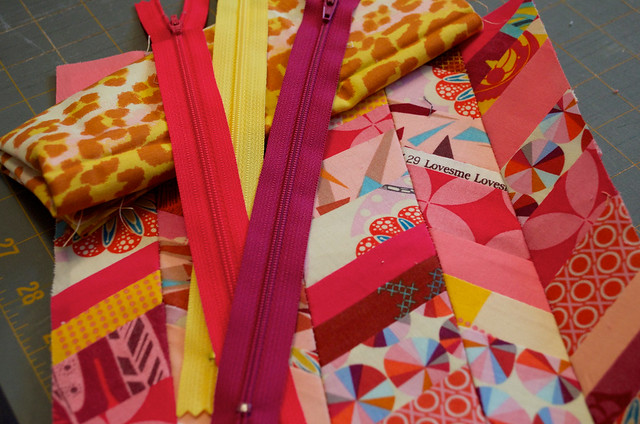
The paper is still intact in the back in this photo.
Before I go further I've asked my Swap Partner whether she is a fan or not...
DSC_0102
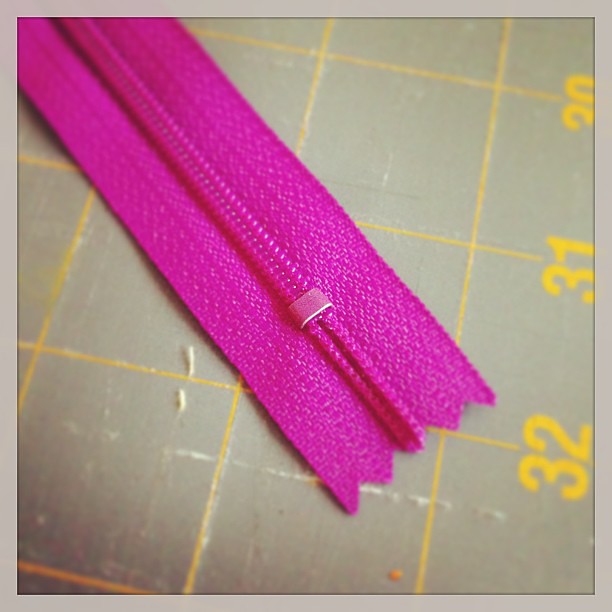
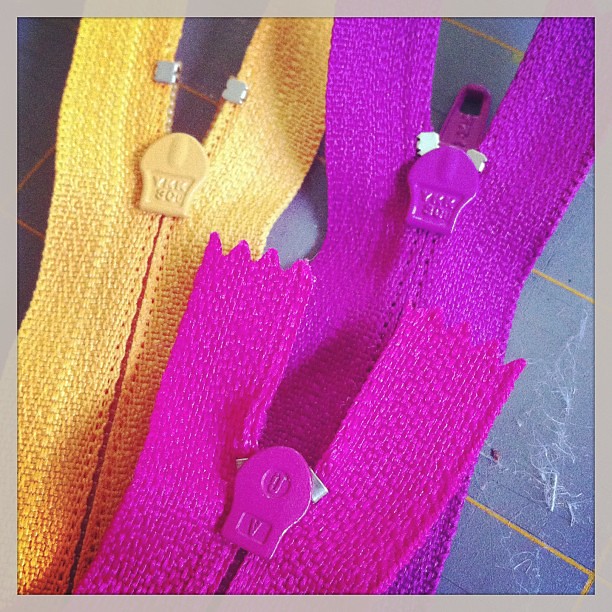
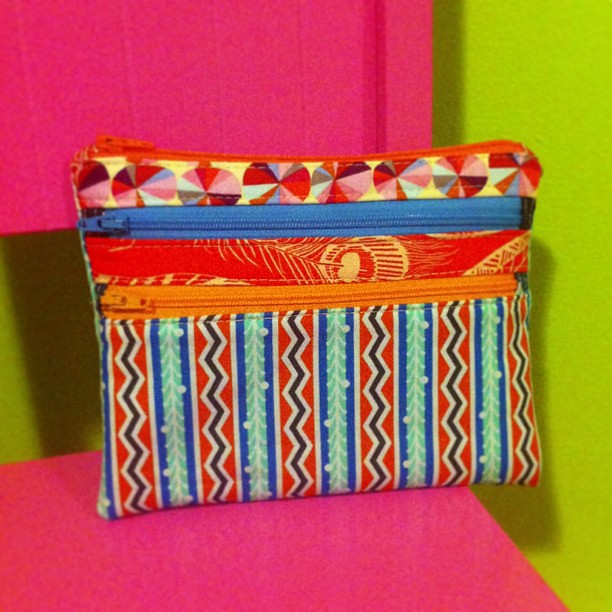
The plan is to use the leopard for the upper most zip and these zippers.  I almost went with a blue zip to emphasize all those blue highlights in the fabric but when I did so the blues didn't pop as much as the blue zip itself seem to overpower them.

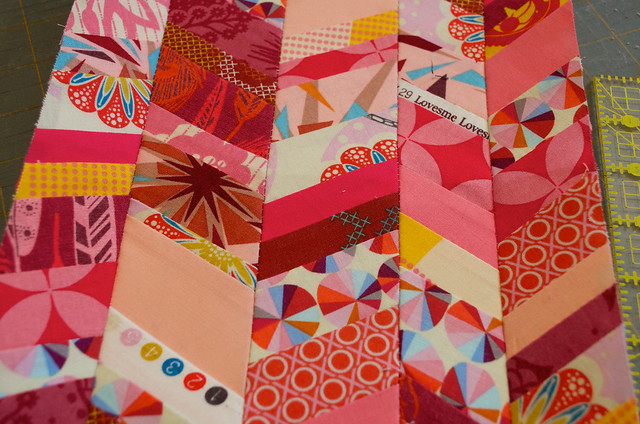
To recap: Anna Maria Horner, paper piecing, pink, selvage, my last last last bits of Good Folks, herringbone...yeah this is going to be hard to give up...

Hmmm...maybe my swap partner hates pink...

- rebecca lynne

Wednesday, August 7, 2013

Triple Salute to AMH

triple zip front #amh
Thanks to the heads up from Erin I learned about and joined the Triple Zip Pouch Swap being hosted by Stephanie at Quarter Incher.  Having never created a triple zip pouch before I wanted to do a test run before committing to final fabrics for my partner.  It is probably no surprise to anyone who follows this blog that I chose Anna Maria Horner fabrics!  However, I will probably never choose a stripe for something like this again, getting that straight was a pain in the arse but I whooped it into shape in the end!
triple zip back detail #amh
I knew I wanted to continue something onto the back so I decided to continue the front/top zip fabric by sewing the massive selvage (seriously, for selvage standards this was pretty large) onto the back.  I love how it gives a bit of an elegant finish to the top!  

I would never have bothered to learn how to make a triple zip pouch without this swap as motivation.  I am psyched to have joined!

- rebecca lynne