Friday, October 14, 2011

Take That! FMQ Friday: Drop Art

DSC_0015

Heh heh... Okay I am still NOT a master...but I did substantially better this week than last.  So take that FMQ.  Eat it.  Ha.  [I know my non-sewing friends are rolling their eyes - but what can I say, this is how I get my kicks.  :P]

Since I am currently IN a wedding today I am actually not posting this real time but have scheduled this to post later.  Cindy, I told you I was dedicated to FMQ Friday and so I am!  Thanks so much to Lucy for linking this for me - she rocks...go visit her...

DSC_0001
Overview

Obviously these are not perfect, they kind of sway this way and that but overall I am really proud of my stitching.  Um, Annabella, I put my stitch length to 0, hahahahaaa, much better right?

DSC_0011
Detail!  LOOK AT THAT!  Hahahahahaaaa...
DSC_0007
Back.  I know...look at that fabric.  Bleh.


DSC_0008
Back detail.  Even the back stitching is rockin'!!!
DSC_0004
Another Glam Shot - BECAUSE  I CAN! 
DSC_0022
Comparison from Last Week

Because I am painfully honest at all times - YES - I included a comparison shot.  Last week still makes me cringe!  This shot is only going to motivate me more because next week will be even better.  I sound confident because I had a lot of caffeine this morning and am feeling very You Go Girl.  

What did I do differently this week?  Stitch length to 0, and also, go ahead and giggle, I hummed a lullaby.  Yup, I sure did.  Miss E calls it the "baby song"and it is simply an old Spanish lullaby I sing when putting the girls to sleep...I think it really helped my rhythm.  I don't know if I'd ever use this pattern because I don't like how your whole bottom is dictated by whatever you do on the top - it made me feel lopsided in my design.  But, perhaps it would be cool to use in a QAYG way because the drops are really fun.

Please go visit the other FMQ Dedicatees at Fluffy Sheep Quilting!

- rebecca lynne

p.s. Have a great weekend.  I am MIA until Monday.  Bye!   

Thursday, October 13, 2011

Thursday Think Tank - the Missy Mac Creations Edition

Thursday Think Tank


Hi everyone.  My name is Erin and I blog over at Missy Mac Creations.  As Becca is off partying and wine-ing it up at a wedding, she has asked me to jump into her shoes and post for this week's Thursday Think Tank.  Afterall, we couldn't leave you all hanging!  I just hope I can pull this off with at least half her charm and charisma.  Eek.

So, let's jump in, shall we?  Of late a major topic of conversation between me and Mr C has been in regards to moving house and, for us, this means renovating.  A lot of renovating.  So, it's no great surprise that fanciful dreams and picture-perfect images have been flitting across my mind making me smile and, no doubt, also setting me up for a major fall when reality hits.  ;)  But... a little fanciful thinking never really hurt anyone so here a few inspirational home decorating ideas that literally have me drooling.


That's an eclectic mix of a few design elements I love. Basically, I like a neutral palette with a splash of colour purple every now and then.  A pillow here, a throw rug there and you've got yourself a cozy home with some individual touches. 

A window seat is definitely something I have always wanted.  Can you just imagine curling up there with a good book and a glass of wine?  Bliss.  Actually... that also goes for the clawfoot bath.  Ahhhhh...

Speaking of books, I think that the most difficult renovation idea out of that lot is the fabulous bookcase under the stairs.  I wonder if Mr C would be interested in adding on a second floor?  I can't really see it being a problem.  ;)

There we have it - my little decorating dreams that I can't stop thinking about.  Thanks to Rebecca Lynne for giving me an excuse to get some of this off my chest.  I feel better already.

And thanks to you all for obliging me by continuing to read through this post.  I promise that Becca will be back next week - no doubt full of her usual cheekiness and sass.

So, what have you been thinking about this week?  I would love to hear your ideas or see what has recently inspired you.  Link up and join the party...

Wednesday, October 12, 2011

Frame Pouch Along or PAL


Okay...I am definitely still running around with my head cut off...but, pssht, what else is new really?  I do not want to lose the momentum on this PAL idea and I cannot live with the idea of leaving you all hanging.  I don't even have a cute little button for this project yet.  Agh!  But, button or no button, before I leave for my trip I am going to leave you guys with some ideas and materials for your pouch!


Design
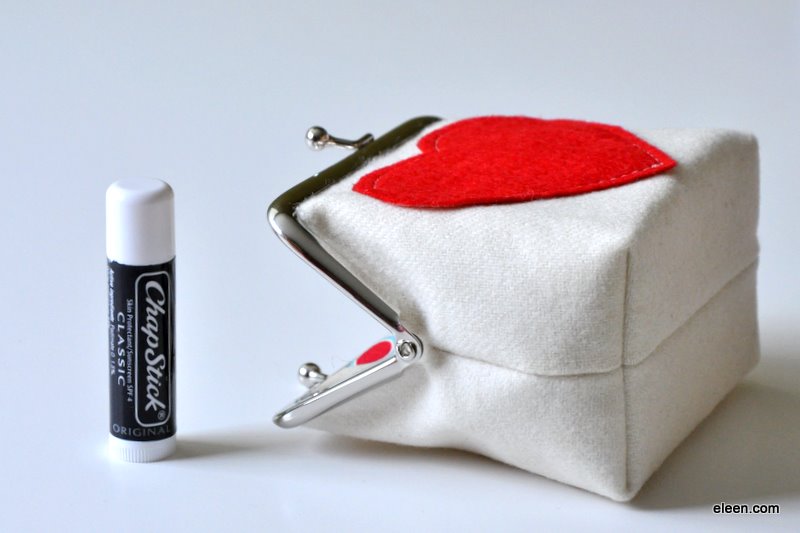
Well ladies, size does matter.  Yeah, yeah, all that crap about it not mattering?  Well, we know better.  So let's think about size.  Are you interested in making a coin pouch, a purse sized pouch, or something altogether distinct like a pouch for your eyeglasses?  Will you go tiny for example...

eleen.com
Is this pouch going to fit in your hand or in a larger handbag?  Do yourself a favor and think about that before venturing in the world of buying a frame...  When buying GET OUT YOUR RULER!  Pouch frames range from 3" to 10"+ so what size is really going to suit you?  In my experience your pouch isn't going to go much larger than your frame...think about adding possibly 1" wider on each side if adding anything at all.

While contemplating size you may also have an idea about shape.  Ah, the shape possibilities are boundless.  Square, Triangular, Round, Oval, Flat, Pleated...  What do you envision?

Source
Source

Puffy or Slender for example...

We will discuss shape more once you have your frame.  If you are not working with a template we will be drafting our own and  plotting that out your ideas now will help you when you have your pen in hand later!


Fabric - finally the beloved fabric.  You can really get crazy here.  Home dec, linen, quilting weight, laminate, fashion fabric (velvet, satin, silk), anything goes.  Color, pattern, detail...it is all up to you.

  • Pouch Frame (Glue or Sew On)
  • Fabric
    • Again this could be anything, but remember you need Outside & Lining.  Unless you are making something huge I can't imagine needing more than 2 FQs or 1 Half Yard total.  Better yet, scraps rock for this and may be your best bet for a design you haven't tried before...
  • Interfacing
    • Ah, yes interfacing.  This can really help your pouch depending on your fabric.  If you have a thick fabric (home dec, laminate) then interfacing may not be for you.  Cottons and most linens are going to need interfacing.
    • If you'd like a puffy looking pouch you will want to get a heavyweight interfacing or possibly batting.  If you are interested in a more sleek but stand alone look than a lightweight interfacing is best.  There is no wrong way here and in fact if you'd like to skip interfacing altogether you can also double your fabric or use scraps to reinforce your outside pattern.  I prefer a medium-weight interfacing for my exterior fabric.
    • I recently made a pouch with interfacing on the outside using a fleece interfacing and I liked the result.  But, I did not like how stiff the lining was...so for this project I am only going to interface the exterior and leave the lining simple.  
  • Glue - for frames that require glueing as opposed to sewing on
    • You need some sort of glue that will be adhere to fabric and metal.  I used crazy glue in my first go of this and that worked fine.  But I used a "craft everything" glue this time around and it was fabulous.  
    • Glues do smell though so if you have a problem with that sort of thing keep it in mind...you may want to get a sew on frame instead of a glueable type.  
  • Miscellaneous
    • If you'd like to add things on to your pouch for embellishment such as embroidery floss for embroidered details, or a small tag to denote its maker...that is totally up to you!
In many cases the most basic of embellishments are what make the pouch!
Tools
- Sewing Machine (or by hand if you prefer)
- Iron
- Scissors
- Paper & Pen
- Pins
- Curved Needle (if you are using a frame that requires hand sewn attaching)
- Screw driver or Large Yarn Needle
- Seam ripper/sharp scissors if you don't trust yourself.  But you should!
I'd love to see your ideas if you have any!  Send us a link and let us know what type of pouch you are thinking of making...

- rebecca lynne