Tuesday, November 29, 2011

Making Christmas...Cards that is...


Snapshots Of Us Holiday Card
Click here to browse Shutterfly's holiday card collection.
View the entire collection of cards.


If you are anything like me then you are all about taking advantage of the sales going on!  My latest and greatest is the bargain I found on Shutterfly.  Plus, if you blog about it like I did, you can request a $10 coupon too (for your next order of course, ha)!  Now that is a deal.

I've hung up the garland and the advent calendar...now if only I had a finished table runner.  Darn it.  Oh well...I'll keep moving along slowly but surely.

How is your Making Christmas going?  Link up to Janine's blog Rainbow Hare Quilts and share with us all!

- rebecca lynne


Lemon Mascarpone & Ham Risotto

Lemon Mascarpone and Ham Risotto


As anyone who knows me will tell you...cooking is just not my bag baby.  I'm just not interested in food.  But, apparently, when I am not able to get my creativity out in other ways I seem to successfully apply my creativity in the kitchen.  Hmmm, hopefully my husband won't read this post or I'm sure my Bernina will end up missing as a result...  This Lemon Mascarpone & Ham Risotto is the perfect example.  I was starving, didn't want something boring, and so I basically used whatever I had on hand in the kitchen.    I swear it is the best risotto I've ever made and second best risotto I've ever eaten.  [The first being the butternut squash risotto I ate at Mr. Browns located at The Sagamore while pregnant with Miss E.]

If you are into healthy or low in fat...well...tough.  You'd better avert your eyes!

Ingredients:
3 cups of arborio rice
6 cups of chicken broth
4 tablespoons of butter (unsalted)
2 regular spoonfuls of mascarpone
shredded parmesan (to taste...about a cup?)
lemon juice (to taste...about a cup?)
salt (to taste)
pepper (to taste)
ham (shredded or cut to small pieces)

What to do:
If you've never made risotto I suggest reading up on it here.  Basically risotto requires a lot of attention and standing over the stove while stirring for 20 to 40 minutes.  The gist is to add ingredients, stir, add ingredients, taste, stir, add, taste, stir...you get the idea.

Start with letting your butter dissolve in the saucepan as it heats.  [*almost all risotto recipes I've seen call for onions being included here...I do not DO onions.  if you are a lover of onions by all means go at it, I cannot tell you what it will do to the taste of this recipe but if you love onions then it can't be all that bad can it?]  Once the butter is melted add the rice and 2 cups of broth.  Stir allowing the butter to get into the rice grains.  Let that simmer until all the liquid seems absorbed by your rice.  Then continue adding broth a 1/2 cup at a time.  Continue to stir so your rice doesn't get stuck to the pan and the liquid distributes evenly.  Each time the broth is absorbed add an additional 1/2 cup.  I went along this way for quite awhile...basically until I was down to 4 1/2 cups of broth absorbed.  Then I started adding ingredients.

I chose my ingredients by whatever I found in the refrigerator and adjusted the amounts according to taste.  I periodically added a spoonful of mascarpone, stirred, added a teaspoon of lemon juice, stirred, added broth, added pepper, added parmesan, more mascarpone...it went like this for a bit.  After adding all of the broth I added the shredded ham.  I didn't want it to get completely lost in rest of the tastes.  If you have an ingredient such as the ham that you'd like to stand out a tad then I would suggest adding it as the last layer.

Once the rice and its ingredients were creamy and a little sticky as seen in the photo above I took it off the stove and immediately in a bowl to serve.  You want to serve risotto as soon as it is ready.

This is what it looked like 26 minutes after taking it off the stove.  I'm pretty sure it was a hit.  Even the picky toddlers ate it!  Ten minutes later and there were no leftovers.

The Aftermath


Well, I don't know about you but this post made me HUNGRY.  I suggest going over to A Quilter's Table to check out what other people are serving up...   Bon Appetit!

- rebecca lynne

Thursday, November 24, 2011

Feeling Thankful... [TTT Special Edition]


For all of my American virtual friends HAPPY THANKSGIVING!!!  I plan to document today's cooking adventures with my mother-in-law...including Sweet Potatoes with Marshmallows.  Ahem, to all the Brits out there.  As my friend's mother once told me "don't yuck another person's yum" hahahahahaa! How will you all be spending your day?

Master J
I am dedicating this post to my sister Teresa who just gave birth to a healthy baby boy last night.  7lb 13oz 20inches long!  Her water broke the previous night so it wasn't a short adventure...but a worthwhile one...  Master J was born healthy with Red Hair!!!  I have no photos to share as I'm sure Teresa is exhausted and recovering...but hopefully I'll see my new nephew soon.


I'm spending this think tank thinking about babies and how lucky we are to have two of our own.  We have a lot to be thankful for.  Including the fact that they sleep through the night now.  Ha!  I am just remembering the smell of a newborn, their delicacy, the awe in holding them, their general delicious squishiness, and the ache of loving one...

I also must brainstorm about what to send Master J as a welcome to the world gift.  I have one thing saved...but a small baby could always use a little more.  So any new baby gift ideas are more than welcome!  Leave me your ideas in a comment!


So as always...

Feel free to rattle off anything that has been brewing in your creative heads.  It can be anything, quilting, home improvement, fashion, crafting, DIY gifts, cooking...whatever you have recently thought "hmmm, you know what I should create" is perfectly appropriate for the Think Tank.  Have a blog?  Grab the Thursday Think Tank button displayed on the right.  

Please leave a link to your T.T.T. on your blog in the linky party below or leave a comment with your Thursday Think Tank ideas!  

- rebecca lynne

Monday, November 21, 2011

O Tannenbaum [Making Christmas November 21, 2011]

DSC_0053

The tree is done!  Yay!  It is amazing how artificial greenery with bits of glass and baubles can change the atmosphere of a room.  Even my girls just seem cheerier when the tree's lights are on.  This will be a photo heavy post...I hope you enjoy our collection as much as we do!

DSC_0051
thinking of adding some additional mercury garland for next year...to make it a bit more drapey

DSC_0057

Blown glass ornaments are hard to find these days but so worth it.  I'd love to have a complete tree with just clear glass ornaments.  Someday, when the girls are grown!

DSC_0067
Blown glass bird
DSC_0036
Blown Glass Whale
DSC_0043
Glass Ship
DSC_0028
One of my Large (4.25") Faberge Eggs.  I collect one each year.
DSC_0038
Vintage Christmas Indent
DSC_0026
more vintage indents and a glass icicle
If you like my "a little bit of everything" tree design then I highly recommend visiting The Weed Patch, The Country Porch, Etsy & eBay when you are looking to add ornaments to your collection.  They are my favorite places to find unique ornaments and you never know what you may come across...

All in all my tree is a combo of Vintage Indents, Blown Glass, and Mercury Glass ornaments.  Whatever that style is I am not sure...but it sure does glitter something gorgeous!

I really do need to focus on Thanksgiving this week...like cleaning the house for my guests?  But, the crayons for the crayon rolls I am planning on making have arrived and I'd like to work on those as well.  As one of our guests will be sleeping in my sewing room I may have to relocate Nina upstairs to do a bit of work at night?  Hahahahaa...we shall see...

Linking up to Making Christmas over at Janine's - how is your holiday prep going?

- rebecca lynne

Thursday, November 17, 2011

Overcoming or Over-thinking Obstacles? [Thursday Think Tank November 17, 2011]

Never fear...I did not forget that today was Thursday.  Believe it or not I have just been amazingly motivated today and have gotten so much accomplished that...well...I just hadn't found time to take a break to write for TTT!  Sacrilegious.  But, while one toddler is down for a nap and the second one seems to be entertaining herself quite happily I thought I should steal the moment and type while I have a free hand...or two...

Thursday Think Tank
As you may have judged from yesterday's post there has been a lot going on right now in my personal life.  This has led to some deep contemplation and not always positive results.  Don't you just hate those moments in life?  I am talking about reflection at all stages of life really...  Maybe if I just get it out here it will help me clear the air a bit so do bear with me or skip ahead I won't be offended!


The Young
My girls are in daycare right now two days a week.  After much debate we enrolled them in the hopes of introducing them to what will happen when I return to work.  But, after two weeks,  I am debating whether to shift them to another place.  Sigh.  There isn't anything wrong with where they are...and there are a lot of positives...but there is another daycare that is different.  I can't say better, after all so much of this is subjective, it is more accurate to say that each place has different strengths.   Needless to say if we change it must happen soon before they become attached to place Number 1.  The Mr. is going to visit Number 2 place tomorrow and hopefully his insight will shed some light on where this is headed.

In addition to all this I have been investigating schools.  Public - the various public school districts in the area and which one is the lesser of all the evils - versus Private.  My girls are young...but for those parents out there you know that these things sneak up on you before you know it!  I've been chin deep in test scores and Principal's phone numbers for two weeks.  Being a parent is hard work!  Each time I find new information I feel that I have gotten no closer to reaching a decision.  Greeeaaaat.


The Venerable
Meanwhile, while building up my new life here, my last remaining grandparent has been in the hospital since August 1st.  August 1, 2011 was quite a day...my birthday, our moving date, and my Grandmother's first admittance to a hospital.  We all kind of knew this was the beginning of her decline and it is so hard to see it finally happen.  She was just recently was admitted to a nursing home and with the holidays around the corner that has been on my mind a lot.  She is 8 hours away from here and I am trying to figure out how to fit in a visit soon.


The In Betweeners
On top of family conundrums here and there I have had my own internal struggle.  I was debating between two jobs.  And yes.  I know.  Two = options.  I am very very very fortunate to even have a choice!  And yet why is it that when you have a choice you are so often miserable deciding?

Anyway after much back and forth...  (I mean serious back and forth.  I had Pros versus Cons lists up the you know what.) I finally reached a decision.  I have decided to return to public service and will be working for the local gov't starting in January.  It will be a great opportunity to do something different with my legal education and instead of being in a courtroom on a daily basis I will be exploring more transactional work.  I've wanted to do that for years now so this is going to be a really enriching, albeit possibly boring, experience!

So...where does that leave us?  Don't worry MRL will still continue...in fact if I know myself at all, and I think I do, MRL will probably be even more important to me because I will need a creative outlet to contrast all that legal mumbo jumbo!  I have learned that my most creative periods have been in direct correlation to whatever boring career or academic choices I have made. But, I still have my work cut out for me!  I have lots to get done before January and I should take advantage of the time I have left.

Starting with...

The Tree
I did, as promised, get started on my tree last night.  Hahahahahaa...unfortunately the 6ft artificial tree that we own does not look as majestic in our House as it did in our small Brooklyn Apartment!  The poor Mr. carried up all those boxes of ornaments only to have to bring them back down again (to protect them from little curious fingers!).  Today the girls and I went on an expedition and located a suitable 7.5ft tree...heh heh...with lights already attached (yay!) that I hope to be in my living room this evening if I have any say about it.  Ahem.

Unfortunately this leaves no twinkly cheery holiday pictures to show you of a finished tree.  But instead, I will leave you with some pics of my favorite ornaments that I purchased last year!  The problem I face is that I cannot commit to a type or theme.  I love all different kinds of ornaments from all different eras and styles.  I didn't decorate a tree last year as we were visiting family so I have no idea whether my ornaments will gel or not.  Either the tree is going to look all thrown together (likely) or it will look interesting and eclectic...  And with impending visitors coming the first week of December to celebrate Christmas I am dying to get a head start to see if I can sort it all out!

Glass Icicles

Antiqued Mercury Glass Garland

Mercury Glass Finials

Miss E's Glass Frog Ornament

Miss V's Glass Red Pig Ornament
My collection of museum quality faberge eggs

My collection of vintage mercury glass indent ornaments

What do you think?  Am I cruising for disaster?  Probably...luckily if I start early enough I can find a way to make all of these things look like they were created to hang together...  Ha!


So as always...

Feel free to rattle off anything that has been brewing in your creative heads.  It can be anything, quilting, home improvement, fashion, crafting, DIY gifts, cooking...whatever you have recently thought "hmmm, you know what I should create" is perfectly appropriate for the Think Tank.  Have a blog?  Grab the Thursday Think Tank button displayed on the right.  

Please leave a link to your T.T.T. on your blog in the linky party below or leave a comment with your Thursday Think Tank ideas!  

- rebecca lynne

Wednesday, November 16, 2011

just getting by [WIP Wednesday Nov 16, 2011]

Well, there has been a lot of radio silence from me lately.  Wow.  I'm such a chatty cathy that it is quite a shocker!  I haven't been feeling so great these days (nausea, vertigo, fluish, more migraines...just general bleh) and when I try to cut fabric I have been getting pretty dizzy so I've been resting a lot.  Hopefully the cold stuff will pass soon...

Add to that some family drama - is it just my family that dregs up the family drama around the holidays or everyones? - and basically it has been a bad environment for being creative.  Hmm...I've really got to change this mojo...

Anyway, I did actually get something accomplished today and technically just under the wire for WIP Wednesday!  Whew hew!  I had completely neglected to mention my being involved in the Color Wheel Swap Part 2 being hosted at From the Blue Chair.

My color?

Red-Violet. DSC_0051

We were asked to pick a light and dark of our color.  So I went with Gypsy Bandana in pink and Flora & Fauna in raspberry.  I have been dying to use this pattern in the Flora & Fauna collection and when the fabric arrived it definitely lived up to my expectations.  Yum!  Look at those bees...aren't they adorable?  I was left with an extra 1/2yd of it (I was afraid I might mess up my cutting so I ordered extra just in case) and am trying to decide what I could do with it next!

As requested by Kati, I paired up the two fabrics (not show here, don't worry I did it correctly, ha), creating two mixed piles, and placed them in ziplock bags before shipping them off to her this afternoon.  I am really happy with the choices I made and can't wait to see how they look with everyone else's!

DSC_0052

Now, I'd like to ask you to all take a moment to reflect on the above photo...  Is there anything more delicious to a quilter than a tidy fat stack of fabric charms?  UM YUM!!!  Can I get a hollah?

In the spirit of turning my blue mood around I am actually going to try to tackle my Christmas Tree tonight.  A bit early I know, but as my mother says when you are in the mood to make up a tree you have to just go with it.  I hope it will get me back in the swing of things.  How are you all getting along these days?  Maybe I'll find you linked up at WIP Wednesday...

- rebecca lynne

Thursday, November 10, 2011

Food for Thought [Thursday Think Tank November 10, 2011]


Thursday Think Tank


I've officially lived in Far Far Away, NY for over 3 months.  Do I miss NYC?  Hmmm...well...up until a few weeks ago I hadn't missed anything specific about NYC at all.  Of course I miss my friends but I have found that the people I was close to before I left are the same people who stay in touch with me even though I am 8 hours away.  But then, dum dum daaaaa, it happened.  I crave NYC food.

Anyone who knows me in real life knows I am not a foodie.  I don't care about food.  I don't enjoy cooking.  Quite frankly, I'd happily subsist on a box of Wheat Thins rather than turn on the stovetop to boil water.  The microwave?  Uh, yeah, we aren't really friends.  I find it a messy annoying beeping appliance that I'd rather avoid.  And when I am in the midst of a creative project - well, I forget to eat completely.  Of course I am completely unique in this regard.  Coming from a Cuban family I was regarded as the freakish anomaly that no one could relate to.  Then I married into a family that also values food, good food, exotic food, expensive restaurants, nice wine, that sort of thing.  But me?  Eh.

So why, why, why am I growing dizzy with desire over the thought of a regular cheese pizza from any New York City pizza place, or drooling with the consideration of an egg and cheese sandwich with salt/pepper on a roll. (I called the local delis to see if they could reproduce this delicacy and one woman said to me "wait a hamburger roll?"  UGH.)  I'd literally kill someone for a decent Saag Paneer, Mango Lassi and Naan.   Pssht, while I'm creating my dream list I might as well throw in some legitimate Cuban Cafe con Leche y Queso...because let's be real, that stuff is truly to die for and every fiber in my being yearns for it and the smell of my Grandmother's kitchen.  Then it hit me.

THANK GOODNESS FOR THANKSGIVING.  


IMG_5089
Our Thanksgiving Spread Brooklyn 2010
Last year we stuck to turkey-loaf as it was just three of us eating.
Miss V was asleep in her swing chair most of the day...

No, it isn't pizza or Indian food...but it is something familiar and comfortable.  A meal that is tried and true.  The menu is more or less a set one and easily managed from most decent grocery stores.  [Having experiences with Thanksgiving in other countries like the UK, Mexico, and Taiwan there are some advantages to our huge overwhelming US grocery stores when it comes to Thanksgiving dinner.]  And because I am jonesing for comfort food I am already mentally preparing my Thanksgiving menu...

  • Turkey 
  • Stuffing (I don't care for stuffing, but the Mr. does...)
  • Gravy
  • Mashed Potatoes (I like mine with butter, garlic, and sometimes cheese.  Plus, they must be mashed by hand as taught to me by my Aunt.)
  • Beets (not cranberry, beets!)
  • Sweet Potatoes with Marshmallows melted on top
  • Dinner rolls with butter
  • A dish of black olives and pickles
  • String beans with almonds
I'm sure there will be more but these are the essentials for me.  I can't even think about dessert...my mind is on the savory items for now.  Ah, I have two weeks to finalize my list before facing the kitchen.  


IMG_5084
Miss E and I making Mashed Potatoes.  By hand of course!

Learning to Sew: An MRL Class
A non-edible issue on my brain these days is a promise to a friend to teach her how to sew.  She has recently acquired a Brother sewing machine and says that when she looks at it all she sees is the needle maliciously glinting at her.  Hahahahaa...I remind her that she has the ultimate power to take the needle out of the machine and show it who is boss!

But, seriously, the think tank on this one.  What to teach her and where to begin?  My experience teaching people how to machine sew has consistently taught me that no matter how comfortable I am with a sewing machine most new sewers are not.  I think I will start with how she can master the machine...once you feel comfortable using the machinery then I think you can really self teach a lot of the piecing and quilting techniques that are out there.  Any thoughts on this?  If you had to teach a friend where would you begin?


So as always...

Feel free to rattle off anything that has been brewing in your creative heads.  It can be anything, quilting, home improvement, fashion, crafting, DIY gifts, cooking...whatever you have recently thought "hmmm, you know what I should create" is perfectly appropriate for the Think Tank.  Have a blog?  Grab the Thursday Think Tank button displayed on the right.  

Please leave a link to your T.T.T. on your blog in the linky party below or leave a comment with your Thursday Think Tank ideas!  

- rebecca lynne

Wednesday, November 9, 2011

Halloween for Christmas?

I have been feeling under the weather lately.  Miss V is teething and Miss E is as energetic as ever and while being pulled into opposite directions by them I am wishing I could stay in bed all day long!  Hahahaha, unfortunately that isn't an option.  Even the Mr. has commented that I haven't been in my studio all week (I think he's noticed the obvious cut into his Video Game playing time!).

Maybe it is the change in weather, change of time, or just a mood swing.  But, this chica hasn't been sewing.  Very disappointing if I do say so myself.

On the other hand it has given me time to think up a long list of to do's.  Many of these have to do with Christmas.  So, I thought I'd record them and link up with Janine's Making Christmas for the week!  I hope she doesn't mind that I am doing it a bit late...

2012 Calendar
Every year the Mr. and I make a calendar featuring the girls for our closest family members.  I am thinking I should start going through these photos and designing the calendar sooner than later.  Here are a few of the contenders for October!

Miss V was a Lion and Miss E was Tinkerbell for Halloween this year.  Tinkerbell was even allowed to wear glittery eyeshadow and blush - very exciting...  It was their first time actually trick or treating. Miss E was thrilled and kept saying the next day "we went for a walk...in the DARK!"  Hahahaha, hilarious!

DSC_0046
Our Lion
DSC_0058
Flying Tinkerbell
DSC_0059
Hungry Lion
DSC_0081
Tink gets her socks and shoes on
DSC_0108
Looking through the loot

I've decided not to do the QAL after all.  I am just not prepared for paper piecing all the blocks...although there are quite a few of them that I think are very clever.  It is just not my style for a Christmas quilt.   Maybe someday I'll go back and do a few of the blocks amidst simpler ones.  For this year I'm just sticking to modern table runners.  I hope to start cutting fabric and working on that soon.  Ha, maybe tonight?

I hope you are all feeling well and haven't let the shift into cold weather get you down.  I'll be making the WIP Wednesday rounds to see what you've all been up to!

Don't forget to check out Making Christmas at Rainbow Hare Quilts...

Photobucket

- rebecca lynne


Monday, November 7, 2011

PLPS & PAL FINISH!

Frame Pouch Along
{all prior Pouch Along links can be found here}

A two in one finish!  I had intended to post this pouch on Friday to complete our Pouch Along week...but instead I decided why not share it on Sew Modern Monday instead?

PLPS Round 3 Final for my Partner

As my regular readers know I signed up for the Pretty Little Pouch Swap this round and was delighted when I was accepted to join!  If you've read over the last month or then you know I have tried a few different pouch designs with different fabrics and shapes.  While stalking my partner and scrutinizing the description of her pouch request I kept going back and forth about my final design.  But here it is!!!

I ultimately went with the beloved combo of natural linen (Kaufman Essex - amazing stuff!!!) and Echino prints.  I wanted something simple but still unique.  So instead of just going with a flat front I tried playing around with adding in a front pocket.  

Echino Pocket Lining

Inside Front Pocket

Echino Lining PLPS 3

And I couldn't resist an Echino selvage detail in the back!!!

PLPS 3 Back Detail

I still hope to continue adding to and improving the Frame Pouch Along.  So if you are interested in providing your design tips or learning from scratch do join in and visit the Flickr group!

Linking up to Sew Modern Monday.  Check out everyone's modern finishes...

- rebecca lynne

Friday, November 4, 2011

Miss V's Strip Quilt [Bloggers' Quilt Festival]

I've been hemming and hawing over which quilt to submit for the Bloggers' Quilt Festival.  I had lofty goals of finishing a new piece but as usual my real life interfered and while I am so close to being finished...alas I still have to bind the Hummingbird & Hexagon quilt.  So, what to choose, what to choose...

I revisited Amy's guidelines for the Bloggers' Quilt Festival and when I read "share one quilt and it's story" I realized that one quilt really stood out.  Miss V's Strip Quilt.

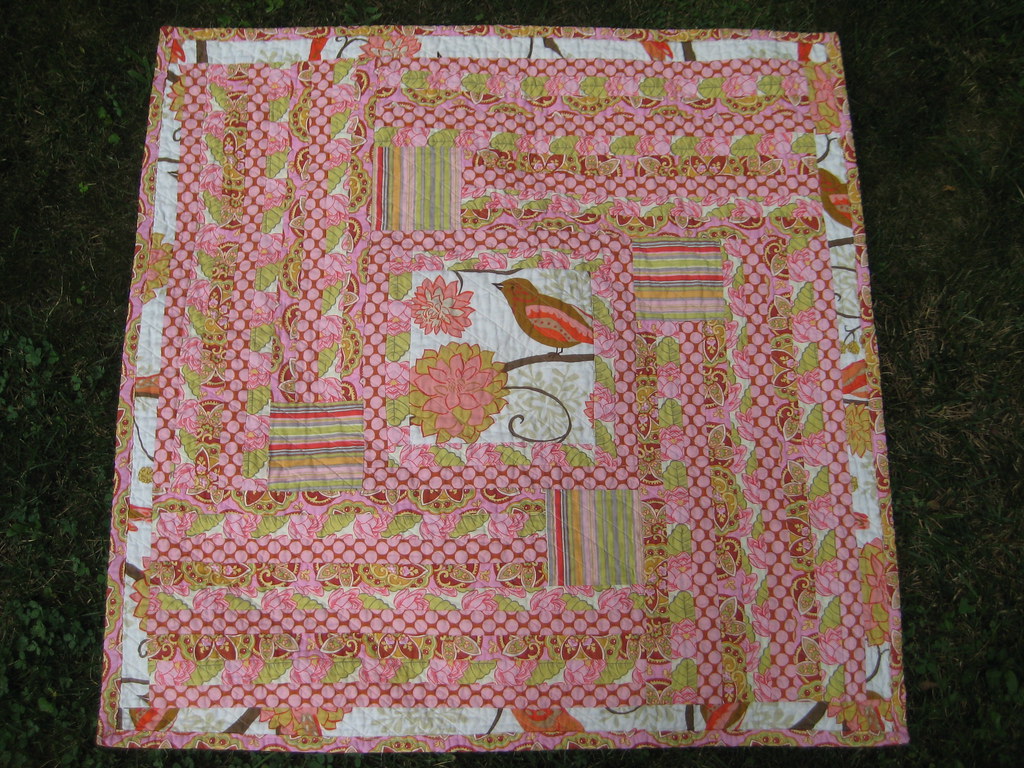
Miss V's Strip Quilt


While pregnant with Miss V I began a baby quilt that I just couldn't bring myself to finish.  I had started it with high hopes but by my 3rd Trimester I realized my heart wasn't in it.  I still loved the beautiful fabric but the piecing I had chosen didn't complement the fabric design and I knew it wasn't working.  To make matters even more frustrating...I knew I wouldn't be happy unless I started a new baby quilt completely from scratch!  New fabric & New Design.  Yes, I do like to make things difficult!

I still adored the complex wavy log cabin design I had used for Miss E's quilt and wanted Miss V's quilt to be as intricate and unique.  After endless online image research, using historical quilts as a source for inspiration, I came across an image of the Phoebe Quilt designed by Valori Wells.  She had based her pattern on an 1800s strip quilt and I immediately knew I had found my quilt design.  Instead of buying the pattern [available at the Stitchin Post] I examined the image of the Phoebe Quilt and drew some of my own sketches to create my own version.  After lots of math, bleh, and a few draw out versions I had come up with my own plan.

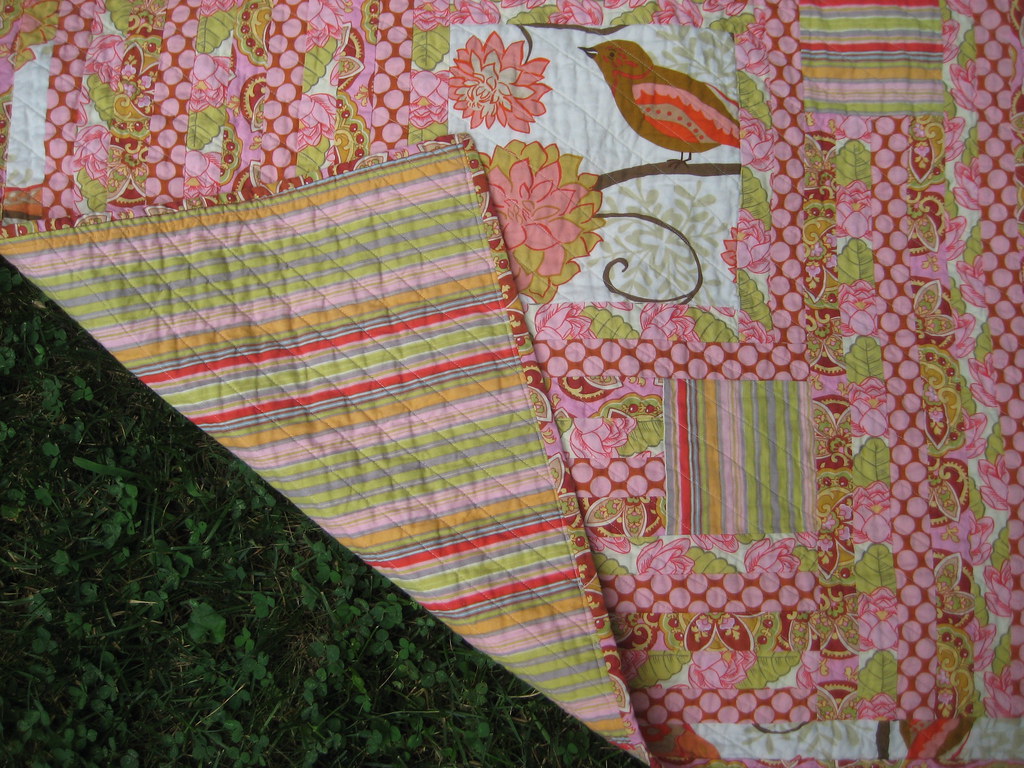
Miss V's Strip Quilt Striped Backing


The quilt consists of one center square, Valori Wells Nest fabric, surrounded by alternating strips to create a swirl movement around the center. Within each panel of strips is a square which acts like a corner pivot around the main square.  The design continually moves without a beginning or end.  The alternating strips and smaller pivot squares are made with Amy Butler's Lotus collection.

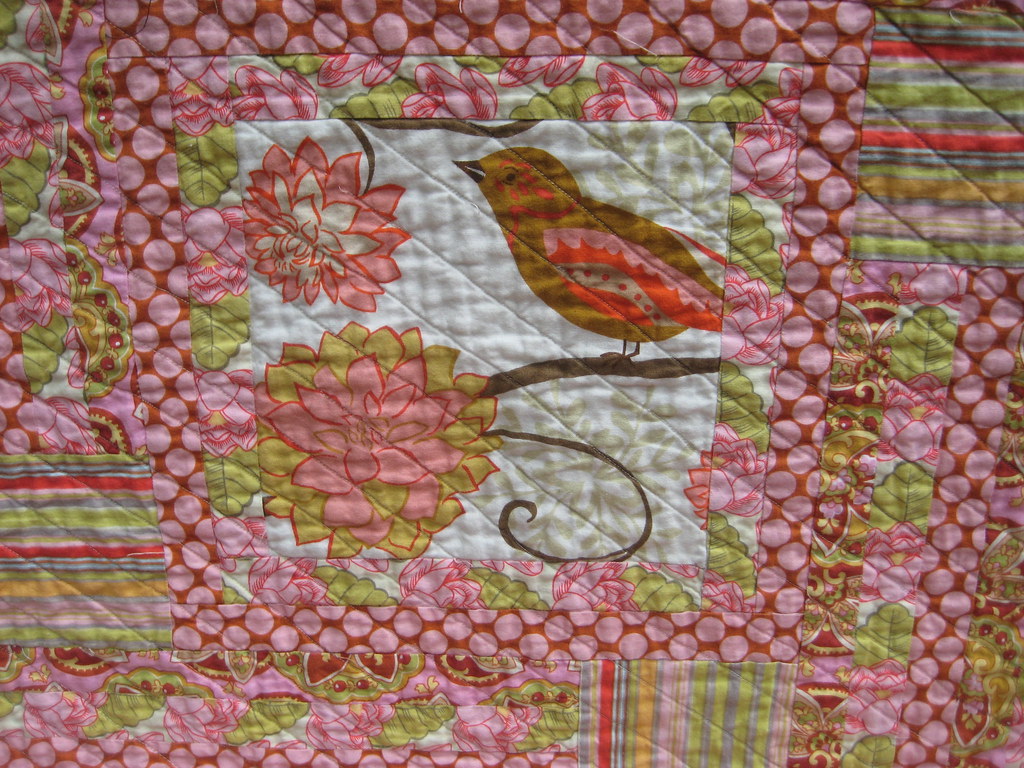
Miss V's Strip Quilt Detail


I considered quilting by stitching in the ditch but decided to reinforce the intricate piecing by quilting right over it in a simple diagonal design instead.  By working completely against the movement of the strips the quilting seems to disappear when your eye is looking at the piecing.  Plus, ultimately the diagonal quilting gave the quilt a really soft and pliant feeling in the end.

Today I look at this quilt and think WOW, this is really busy.   I don't know that I would make something so pattern crazy without a solid or neutral to rest the eye on today...but when I consider what I would do to change it I can't think of a thing.  It suits Miss V so perfectly, she is cheery, bright, loud, pink and squishy just like her quilt.  And when I lay it over her during her nap time I know it was just the right thing for her.

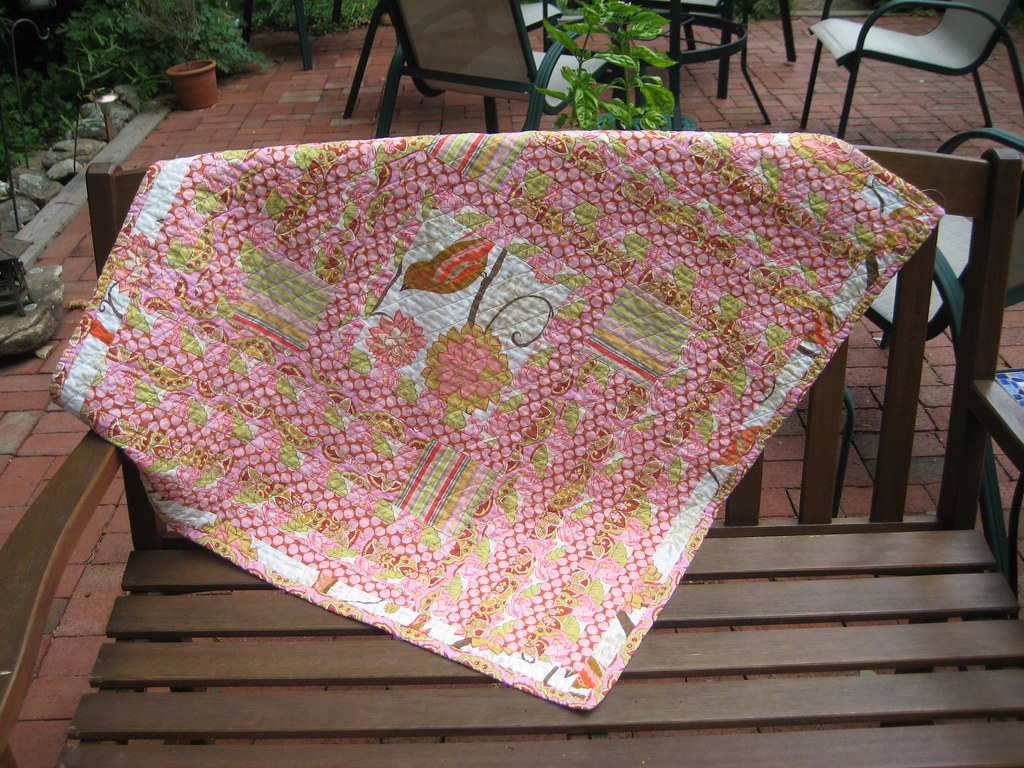
Miss V's Strip Quilt

Hahahahaa, for the first time while writing this I have realized another anecdote about this quilt.  The baby quilt I had originally started is not the only thing I had serious doubts about in my 3rd Trimester of pregnancy.  I also doubted the name we had chosen for the baby.  Just like the quilt I completely changed my mind and went with a new name too.   Hahahahaa, who knows who Miss V would be today with a different quilt and a different name.  Thank goodness I went with my gut and decided to change my mind.  I wouldn't change her for anything in the world!


Amy'sCreativeSide

I'd like to thank Amy for the opportunity to join the BQF.  What an amazing gift to all of us quilting bloggers to be able to share our favorites with each other.  I am really happy to see so many of my friends quilts already posted and am psyched to be able to post one of my own quilts alongside!

If you haven't already...go check out the Bloggers' Quilt Festival!  What ARE you waiting for???

Thursday, November 3, 2011

Gluing the Frame Pouch


Frame Pouch Along
{all prior Pouch Along links can be found here}

I know that for many of you the gluing aspects of creating a frame pouch is the most daunting part.  In fact, it was the questions about this part of the frame pouch process that motivated me to do a PAL in the first place.  So...let's do it.  

What you will need is some appropriate glue which I discussed in the materials post of the PAL.  You will also need a flathead screwdriver or a thick needle like a yarn needle or any tool you can find that will fit within the rim of the frame.

DSC_0092

Ready???  Heh heh...I am going to do my best to really break this down.

First flip your frame upside down and hold it with one hand.  Next take your glue and carefully guide it inside on ONE SIDE ONLY.  Remember, gravity is your friend so keep your frame upside down.  You can place the frame on a protected surface if you'd like your hands free.  

Tip: Read the instructions for your glue!  Most glues say that they are the most adhesive after one minute or so...what does that mean for you?  Wait a minute before you start placing your fabric inside!  It can be hard, and takes real self-restraint, but believe me it is worth waiting to get it correct the first time.  If you need to make yourself walk away while you wait.

DSC_0093

Here is a close up shot of my glue.  Can you see it glistening?  What you can't see in these photos is that your glue will likely be goopy, frustratingly slow in spreading, and stringy.  Have a piece of scrap fabric or interfacing to place your glue container down or else you might get flustered and goop it all over your workstation.  Your ultimate goal is to AVOID GETTING GLUE ON YOUR POUCH FABRIC.  Just accept that glue is probably going to get on something you don't want...but better it be the metal frame than the fabric.  When the glue dries it can easily be rubbed or scraped off the metal with a finger nail...but it is much worse on the fabric.  So that should be your overall achievement --> no glue on your fabric!  

DSC_0095

After you've patiently waited the allotted time you will want to start feeding your fabric into the frame.  Now STOP!  Remember, your frame is upside down...so your fabric should be as well!  Believe me, it is easy to attach the wrong side to the wrong frame side so double check before any fabric hits the glue.

While holding the frame AND the fabric upside down, I line up my corners with the corners of the frame.  Then I start sliding in one side.  The way to describe it is as a pinch on the fabric while pulling down and inside the frame.  I keep a hold of the first side I have fed into the frame while working my way around the frame.  This will take two hands.  {obviously this is why I have no photo of it, heh heh}

DSC_0096

As you can see in the photo below, I have worked my way around the frame and slid the fabric in all the way around being sure to line up the corners with the frame corners.  Oh and in case you didn't realize I am still working upside down!!!  Gravity is your friend.

DSC_0097

Now to be sure that your fabric is fed all the way in and is securely inside you will now use your screwdriver, fat needle, or whatever other tool to fit inside the frame.  Be forewarned, the glue is still extremely dangerous now and if you push too hard with a screwdriver then you may ooze the glue out so watch out.  The glue comes out on both sides so be sure to flip your piece to the other side and check that your fabric is "safe" from glue ooze.

DSC_0098

And, as I said, inevitably glue will ooze.  Make sure it happens on your frame!!!  When it does DO NOT TOUCH IT.  I know it is hard, it kills me not to mess with it as soon as it happens but trust me, it will be easier to deal with when it dries.  The more you fiddle with it now the more ooze and possible fabric contamination can arise!  Be patient...just let it go and deal with it later.

DSC_0110

Again, I will remind you to check both sides of the pouch.  All the fabric that need be is inside?  No gaps?  No glue ooze on the fabric?  Looking good?  Remember, you can use your tool to be sure that the fabric is in there, just watch for glue ooze although this will decrease as time goes on and the glue dries more.

DSC_0101

Wow.  This is really all about patience.  Because now I am going to tell you that once you have one side intact you must wait.  Well...must is strong.  You should wait.  Let the glue set so that there is no danger of the fabric sliding while you do the opposite side.  Again, I know it is hard but you can do it!  I would say to wait a few hours, but who am I kidding?  I waited about 5 minutes and then couldn't wait to get the other side done.  After all...you are almost there!  While you wait lay your pouch down in a way that gravity can help.  

DSC_0099

You still with me?  Almost there...soooo close!

As you can see here I've rested my frame down.  Now that it is a bit drier the glued portion is the top in this photo below.  I now need to add glue into the frame portion below.  Again, working with gravity.

DSC_0105

The trick?  Mmmm...oh only making sure the unattached fabric doesn't get glue goop on it as you fill the frame.  Yeah, none so fun but totally doable!  I literally held the frame in my left hand and kept a few fingers spread wide to hold back the fabric while I used my right hand to drip glue inside the frame.  

DSC_0106

Don't forget.  WAIT!  At least one minute or whatever the instructions recommend for ultimate adhesion.  I rested my frame against the table and waited.  

When the minute ended I picked up the frame in one hand, as you can see below, and working from behind the frame I guided the fabric inside the frame from the back.  It sounds complicated but it isn't.  And working with the frame upside down again you can really see where the fabric is going.  

DSC_0108

Just as before I lined up my corners and worked the fabric inside all the way around.  Use your tool as needed and check for ooze!  Remember to flip your piece over and check both sides.

DSC_0109

When you are done with that?  You are done!  Now, all you need to do is wait.  Hahahaha again!  This time to make the glue dry completely.  It is frustrating but do it.  Last night I wanted to take photos of mine and started to shut the frame with whoops! the fabric slipped out of the frame on the last glued side.  Agh!  Take it from me...waiting is worth it.  And, again, use gravity and if you can let your pouch dry upside down.  Wink!

DSC_0111

Frames Requiring Hand Sewing
For those of you with the hand sewing type of frame don't worry I haven't forgotten about you!  In fact, I'd like the opportunity to make my own hand sewn frame and write up a tute of my own.  But, because I don't want to hold you back I am leaving you with this link to an Everything Mary tutorial on how to attach your frame.  


Don't forget to hook up and into our Flickr Group!  We have some awesome photos being shared so far.  Go check it out and cheer on your friends...

- rebecca lynne